Wednesday, July 31, 2013
Wednesday, July 24, 2013
Tuesday, July 23, 2013
Buffalo Chicken Salad
I love buffalo wings! Unfortunately they aren't the best for me. So when my friend Holly shared this recipe I just knew I had to try it! I still get that buffalo and blue cheese taste but without all the calories!
Mixed greens
2 - 3 oz. cooked chicken breast, cubed
2-3 Tbsp. Franks buffalo sauce
2 slices from a red onion
3 Tbsp. blue cheese dressing
Add the red onion slices to a small frying pan with a little olive oil and brown. Fill plate with mixed greens. In small Ziploc bag add cubed chicken and Franks buffalo sauce, close the bag and shake the chicken and sauce. Add the chicken mixture to the mixed greens. Top with onions and blue cheese dressing.
Blue Cheese Dressing
1/2 cup plain Greek yogurt
4 Tbsp. blue cheese, crumbled
Juice from one lemon
Salt and pepper to taste
Mix all the ingredients in a bowl.
Friday, July 19, 2013
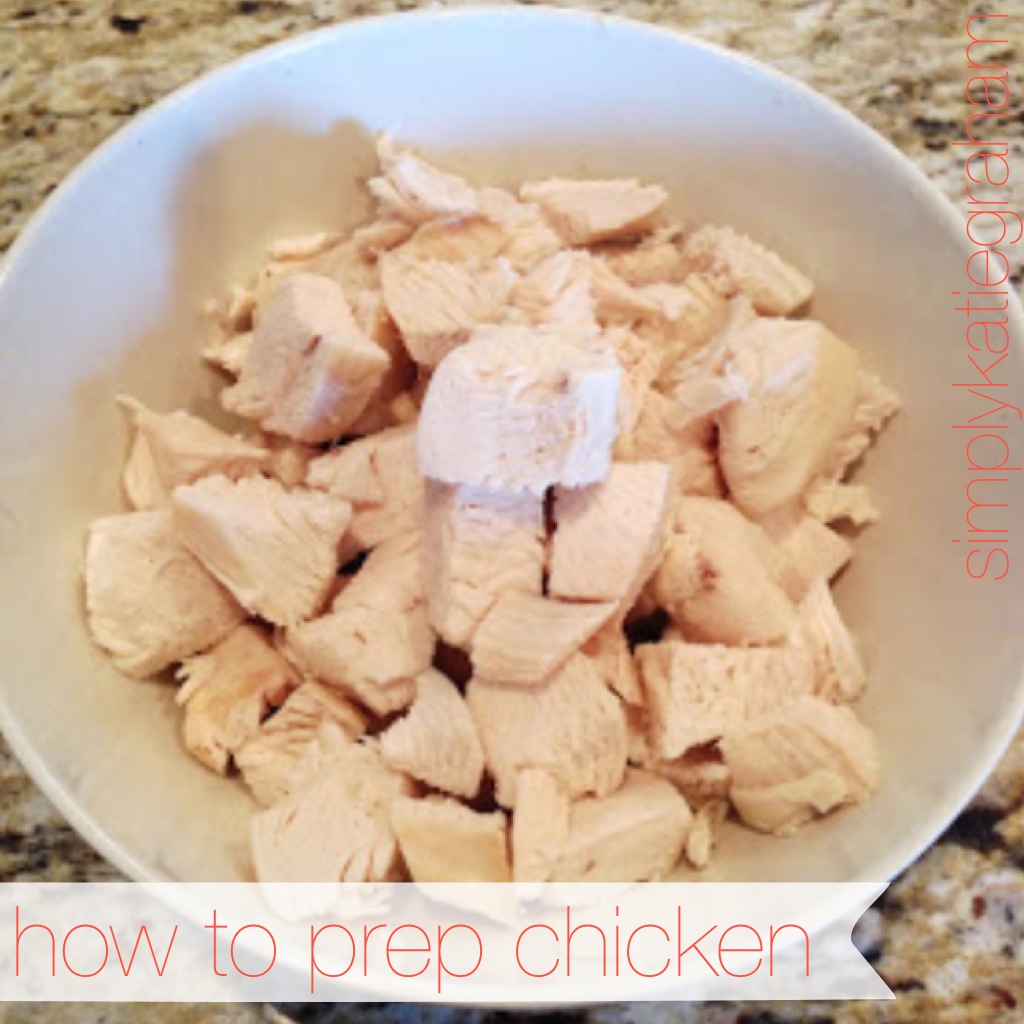
Chicken Prep
Okay, so I have had a few people as me how I prep my chicken that I put on my salads, so I thought I would share! It is pretty easy and I like to do this about once a week.
I buy the single packaged frozen chicken breast from Costco. I take the frozen chicken out of the packages and fill a pan will hot water. Add the chicken to the hot water and set on the stove. Set the timer for 25 minutes and bring the chicken to a boil. Once it starts boiling I turn the heat down to medium. When the timer goes off I check the chicken to make sure it's done. From here I will either put it in my Kitchen Aid and shred it, or I will let it cool then cut into cubes. I keep the cooked chicken in some tupperware and use it throughout the week for different meals. You can use the chicken for salads, tacos, quesadillas, chicken salad sandwiches, casseroles, or whatever else you can think of to put chicken in.
Food prep is key for my healthy eating. If I don't have healthy quick food ready to go, then that is when I usually want to go grab something quick from a fast food place. Salads are so quick and easy, I make sure to have chicken and toppings on hand and just throw it all together.
Thursday, July 18, 2013
Cafe Zupas
I have heard everyone talking about Cafe Zupas and how amazing, healthy and delicious it is... but
I have never been there before!
I know! I know!
Well, lucky for me, my friend Darci invited me to the VIP private party for the new Cafe Zupas opening up on Lake Mead. So I quickly found a babysitter (my sister!) and RSVP'd to the event! Nothing is better than a healthy, free, and delicious date night! It was so much fun and so good!
Now I know why everyone talks about it all the time! Everything is fresh and made right in front of you. The food is so colorful, bright, and healthy.
I ordered the Pesto Chicken Sandwich, Nuts for Berries Salad, a cup of Wisconsin Cauliflower Soup, and the Summer Superfood Pistachio berry Creme Brûlée.
seriously...
They had me at superfood!
Pistachios- promote heart health, reduce cholesterol and is a good source of fiber.
Blackberries- are full of fiber, antioxidants, and vitamins.
and the Nuts about Berries Salad, how can you go wrong with fresh raspberries, blueberries, strawberries, blackberries, cinnamon almonds, romaine lettuce, and a house-made poppyseed dressing?
AHHH-MAZING!
It was such a fun night. The people where kind, helpful, and informative. The service was good and quick. The food was so good and healthy! It's nice having a place to eat here in Vegas that is healthy and refreshing especially when it's 110 degrees outside!
I can't wait to come back! Anyone want to schedule a lunch date?
The Grand Opening for this Cafe Zupas on Lake Mead and Buffalo is
August 3rd.
1/2 off of everything plus they will be giving away $25 gift cards every 15 minutes all day!
You don't want to miss out!
Wednesday, July 17, 2013
10 Day Fitness Challenge
I just hosted my first 10 Day Fitness Challenge and let me just say, it was amazing, and I am down 2.5 pounds since the first day! We do have longer challenges that are 60-90 days, but I found that this is a great way for people to see what I do and be able to participate in a challenge before committing to a 60-90 day challenge. This is from one of my friends who just completed day 10 of my challenge.
It makes me feel so good to know that I am helping people change their life! Seriously, there is no better job than this! I am going to be doing these challenges monthly, so lucky for you, I have one starting on Monday, August 5th!
To contact me about one of the challenges, either the 10 Day Fitness Challenge or a 60-90 day challenge, you can email me at simplykatiegraham@gmail.com. You can also find me on Facebook and message me there https://www.facebook.com/simplykatiegraham.
The next 10, 60 and 90 days will pass by whether you make these changes right now or not. So quit making excuses and make the change now!
Wednesday, July 10, 2013
Chicken Taco Salad
i love salad. I can eat it all day long, as long as it's full of yummy stuff! This chicken taco salad is one of my quick go to salads. I keep everything on hand so I can quickly make one up if I am in a hurry. I have a few of these go to salads so I will post some more recipes later this week.
Chicken Taco Salad
3-4 oz. shredded chicken
Fresh pico de gallo
1 serving of tortilla strips (I find mine down the isle with salad dressings, next to the croutons.)
Pickled jalapeños
Black beans, rinsed (not pictured)
Corn (not pictured)
Cilantro lime vinaigrette
I just throw it all together on a plate and add the cilantro lime vinaigrette. I found the cilantro lime dressing at Costco. It is a quick, easy, clean, healthy, and filling meal!
Chicken Taco Salad
3-4 oz. shredded chicken
Fresh pico de gallo
1 serving of tortilla strips (I find mine down the isle with salad dressings, next to the croutons.)
Pickled jalapeños
Black beans, rinsed (not pictured)
Corn (not pictured)
Cilantro lime vinaigrette
I just throw it all together on a plate and add the cilantro lime vinaigrette. I found the cilantro lime dressing at Costco. It is a quick, easy, clean, healthy, and filling meal!
Tuesday, July 9, 2013
Rhonna Designs
I have had so many people ask me so I thought I would share, have you guys tried the new Rhonna Designs app? If not you have got to check it out! It cute lettering and graphics that you can add to your pictures. Here are a few that I have done with the app. Its so fun and there is so much you can do! Warning: You will spend lots of time playing around with this!
This last picture is healthy peaches and cream! A summer must have! I cut up some peaches, added vanilla almond milk, and a little honey. A yummy healthy treat! Now go try this too!
Thursday, June 27, 2013
Finally painting again!!
Even though it was 700 degrees outside today, Nicole and I started working on a new project. Yay, it has been way too long! I am so excited for this project mostly because it is for ourselves! We are using old doors to make into shelves. Here is a little sneak peak. I can't wait to show you the finished project, so stay tuned!
Tuesday, June 25, 2013
Street Tacos
We had street tacos for dinner tonight! So yummy! Here is the recipe...
Street Tacos
- 12 corn tortillas
- 2 cups chopped cilantro
- 1 cup minced onion
- flank steak or meat of your choice
- salt, pepper, and California style garlic salt
- 2 tbsp. olive oil
- limes
Instructions
- Heat up a grill pan and drizzle a bit of oil on top.
- Chop the meat into strips, salt, and garlic.
- Add the meat to the pan.
- Leave it alone for a few minutes before flipping.
- The goal is to crisp the meat a bit.
- Warm the tortillas in the microwave for about 45 seconds (stacked and wrapped in a paper towel).
- Arrange the tortillas on a platter, fill with the meat, onion, cilantro, and lime juice.
- Enjoy!
Wednesday, May 29, 2013
30 day results!
I have finished 30 days of Insanity and Shakeology!
I would have normally quit in the first week but because of the challenge group I am in I have stuck to it. Having others hold me accountable is what has gotten me through this first month! I can't wait until month 2!
I have lost my measurements from the beginning, but I took them again at day 15. So from day 15 to this morning, I have lost a total of
11 inches!
and since day 1 of Insanity, I have lost 3 pounds! I am excited for this next month and to see more amazing results!
We have new challenge groups starting each month so let me know if you might be interested.
Wednesday, May 22, 2013
Kid Friendly
One of my favorite things about Shakeology is the fact that my kids can drink it. A few days ago I was talking to a friend about the shake that she drinks so I was curious about it and looked it up. One of the very first things that stuck out to me was one tiny little sentence that said... For ages 12 and older. What does that mean? Why is it safe for you but not for children under 12? Why would you put something in your body that you wouldn't be able to give to you kids?
I don't know about your kids, but I have a hard time getting mine to eat fruit and veggies. Since we have changed our lifestyle they will eat them more, but not enough. So I love that I can give them Shakeology and know that they are getting all the nutrients. They love it and I love knowing that it is safe for them to drink, healthy, and that it is 100% natural.
Monday, May 20, 2013
No Bake Energy Bites
I don't know what it is about Sundays, but for some reason being home all day with family makes me want to bake some yummy treats!
For so long I have just avoided making anything because I don't know how to make anything sweet and yummy without making anything fattening!
Luckily my coach posted these delicious No Bake Energy Bites.
When I first saw the list of ingredients I was a little intimidated because I have never used wheat germ, ground flax seed and chia seeds before, I didn't even know where to buy them! My coach told me that she goes to Winco in their bulk food section. I found everything I needed there plus some! It's my new favorite place. If you don't have a Winco by you then try a whole foods store, or I even saw some of the ingredients at Walmart.
I also found some agave at Winco while I was there, so I used that instead of the honey. These were so easy and yummy! My whole family loved them! Perfect little treat or snack! Give them a try!
No Bake Energy Bites
There are so many variations of this type of no bake cookie. Just throw whatever nuts/seeds/dried fruit that you have and experiment.
1 cup old fashioned oats
2/3 cup toasted coconut flakes
1/2 cup natural peanut butter
1/4 cup ground flax seed
1/4 cup wheat germ
1/2 cup mini chocolate chips (optional)
1/3 cup honey
1 tbsp chia seeds
1 tsp vanilla extract
Mix everything together really well in a large bowl and let chill in the fridge for half an hour. Once chilled roll into balls. I used a tablespoon to measure them then had to squeeze them pretty well to make it all stick together. Store in an airtight container in the fridge.
Friday, May 17, 2013
Workout clothes!
No judging! :) This is straight out of bed with no makeup and major farmers tan!
I wanted to share with you my workout gear.
I love this tank top from Old Navy. It's a must for me and is loose and breathable!
I normally wear some running shorts, I got a few pairs from Old Navy and target for cheap.
I workout at home, so for a while I did it without shoes. I noticed my knees hurting after my workouts so I have started wearing them again. I got these Nike runners from Kohl's a few months ago.
That's it, that is all I need. One thing I love about Insanity is that you don't need any special equipment, it is all about using your body!
Tuesday, May 14, 2013
12 weeks
I love this and I can't wait to see the changes! All of my hard work will pay off! This has been one of the hardest things I have decided to do but yet it is so rewarding. I never thought in a million years that I would be able to do Insanity. I can. So can anybody else that wants the change. If you want it bad enough you will fight for it!
Shakeology has given me the energy I need to get through these workouts and not want to take a 3 hour nap afterwards. I love that I get so many healthy ingredients each day in one little shake. It tastes so good that I crave it! I love this program. It works. It has changed my life. I can't wait to say that I have finished the Insanity workout program and you better believe that I wont stop after I am done. This is just the beginning!
Monday, May 13, 2013
Oldie but Goodie!
This is an oldie but goodie! I love my kitchen and the changes that we made! At the end of this long post I have current updated pictures of my kitchen today. Lucky for you, I cleaned before taking them :)
.....................................................................
May 2012
Here is the long awaited kitchen cabinet makeover!
I am so excited to share because I love, love, love, how they turned out!
These are pictures of our kitchen before we even moved in and painted. I fell in love with the house because of the kitchen. I love my huge island, the room to move around, and the openness into to the living room. I just wasn't a fan of all the dark colors. The floors were the same color of the cabinets, there was no contrast. So before we even moved in my plan was to paint these cabinets.
We first started by labeling all the doors and drawers with numbers then removed them. Then we taped all around the inside (the kit doesn't give enough paint for the inside, I wouldn't want to do that anyways, too much work!) and outside of the cabinets. We covered the floors and counters with plastic.
I had a big package of Red cups from Costco which came in handy for the whole project. We put the hardware in cups and labeled which door they belonged to. I didn't want any screws, hinges, and knobs to be lost. This was a great way to keep track of them all.
We bought Rust-Oleum Cabinet Transformations. The kit is supposed to be a quick easy project. No sanding or stripping, just deglossing. The deglossing took forever! I read all over the Internet that if you don't degloss very well then the paint won't stick and can chip. So we deglossed till our arms fell off. After delossing all the drawers and doors We were still a little worried about just using the deglosser so we created an extra step for ourselves and decided to use a high grit sandpaper and sand everything. (The lower the grit the rougher the sandpaper is. The higher the grit, the smoother the sandpaper.) I am sure it would have been fine without sanding, it was just about a peace of mind for me!
The red cups came in handy when it was time for painting and drying. On the instructional video they suggested using a 2x4 with screws that are screwed in just enough so it can hold the doors. On one blog I read, she said that the screws just left marks, plus, that seams like a lot of screws and 2x4's. The cups were much easier and left no damage.
Once all the dust was cleaned off, the real fun began! Painting! It was fun for about 5 doors until we realized that this was going to takeforever. The doors are supposed to take 2 coats of paint and one coat of the finish. The kit also comes with a glaze to give it a more wood look, but I like the Linen color by itself so we skipped the glazing step.
I found this cabinet door at DI for Kambree to paint. I knew there was no way that she wasn't going to help. She loved helping and she did a pretty good job!
There are 2 sizes to the Rust-Oleum kit that we bought. We measured the kitchen and figured that we only needed to by the small kit. We even ended up with extra paint. The problem was from going from extreme dark to extreme light the 2 coats didn't cover all the way. It needed 3 coats of paint. UGH! We had enough extra to paint the cupboards, but not enough for the drawers and doors. So we had to go buy another kit. So, if you are going to paint your kitchen cabinets from dark to light and your not going to use the glaze, then you should probably make sure that you are going to have enough paint for 3 coats.
This whole thing was a lot of work but totally worth it. With Brian working and 2 sick kids, it took us about 9 days from start to finish. A lot of the blogs or tutorials I read say that this is a quick weekendproject. We did give ourselves extra steps as far as sanding and the extra coat of paint. I still don't think that if we skipped those extra steps we could have finished in a weekend.
Anyways, it is done! I am so excited! I love how they look! Totally worth all the hard work!
What do you think?
{before}
{after}
Subscribe to:
Posts (Atom)